Overview
It’s come to the point where I want to record ECU data for my SoloData project. The Miata has a Megasquirt ECU that has the ability to broadcast engine parameters via a high-speed CAN bus. CAN stands for Controller Area Network; it’s the most commonly used transport in the automotive industry for connecting sensors and controllers. It’s a simple 2-wire bus that uses 11bit or 29bit identifiers. CAN packets have a maximum payload size of 8bytes (64bits), which means the packets are usually densly packed with information and require careful bit manipulation to interpret.
Megasquirt ECU Setup
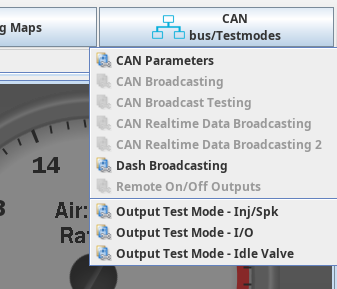
Before I can try to record data from the Megasquirt ECU, I needed to enable CAN data broadcasting. This is easliy done through TunerStudio. All the CAN settings can be found under the CAN bus/Testmodes dropdown menu.
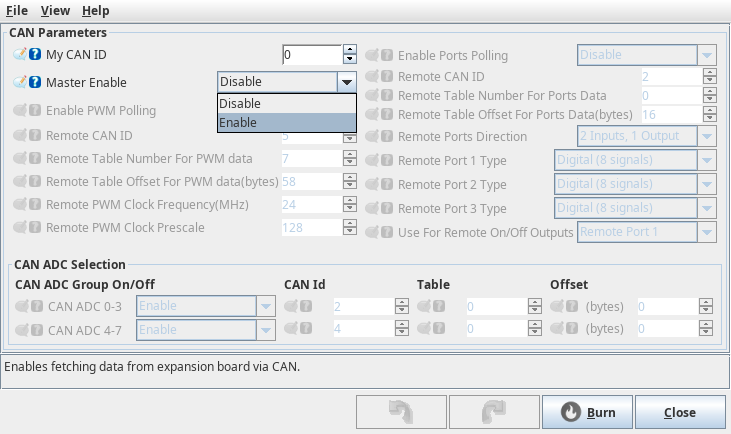
To enable CAN output on the ECU, you need to go to “CAN Parameters” settings and turn on the “Master Enable” setting. I left my ECU’s CAN Id defaulted to 0.
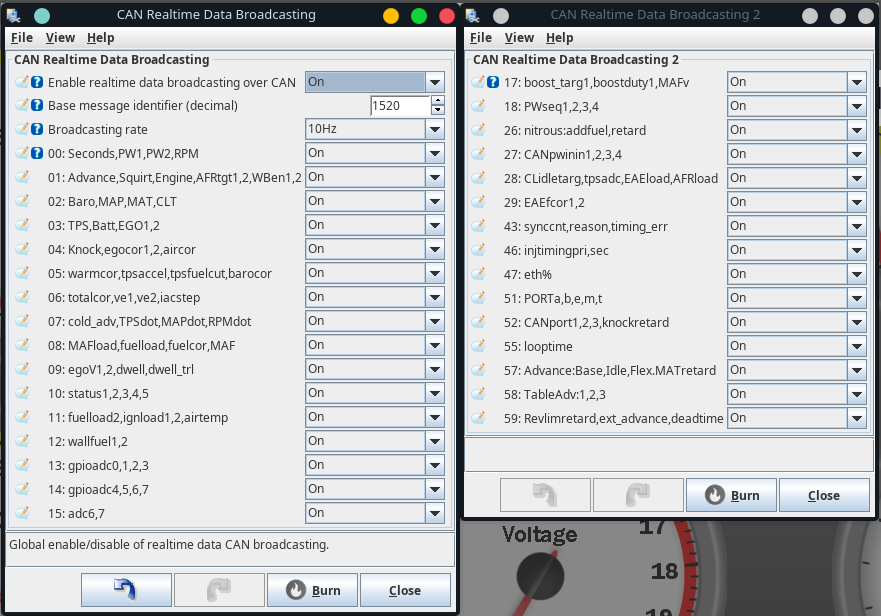
Once the CAN bus has been enabled, you’ll have access to the two “Realtime Data Broadcasting” settings windows in the CAN bus/Testmodes dropdown. I opened both settings windows and enabled broadcasting for all data fields. For testing, I just left the broadcast rate at 10Hz, but I intend to record data at the max rate of 52Hz later on.
Raspberry Pi Setup
To get a Raspberry Pi interpretting CAN bus traffic, I used an MCP2515 CAN interpreter. The MCP2515 is extremely common and you can get breakout boards on eBay for a few dollars. The chip taps into the Raspberry Pi’s SPI bus, and there’s a device tree overlay you enable to get a Linux SocketCAN interface. I followed this forum post to get it all setup; it’s amazingly simple!
Once I had the MCP2515 setup on the Pi, I was able to use the candump program to listen to traffic from my ECU. Here are the frames that I captured with my ECU powered on while removed from the vehicle.
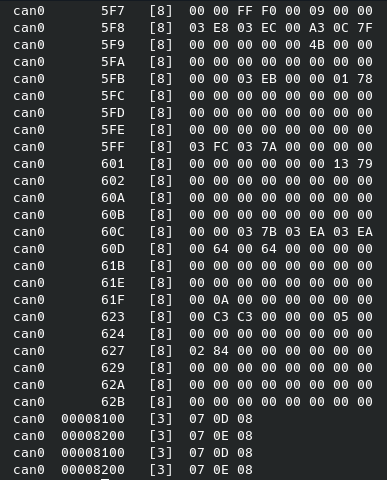
You can use candump’s ‘-l’ option to record the frames to a file and playback recordings with the canplayer command. This proved to be very useful for code development later on.
# record frames from CAN device 'can0'
candump can0 -l

# make a virtual can device for playback
sudo modprobe vcan
sudo ip link add dev vcan0 type vcan
sudo ip link set up vcan0

# playback recorded can0 data into vcan0
canplayer vcan0=can0 -I candump-2021-03-19_122026.log -l i
CAN Bus Daemon
To service the CAN bus, I made a daemon service called “cand”. It listens to the SocketCAN interface and converts the raw CAN frames into higher level protobuf messages that I can stream or record.
The daemon makes use of the DBC file that the Megasquirt provides to inerpret the raw CAN data. The DBC files describes all the Megasquirt signals that are packed into each CAN frame.
To read the DBC file, I used xatavian/cpp-can-parser, which is a C++ library that provides a clean API to lookup information in the CAN DBC. The cpp-can-parser library only supported DBC file parsing, and didn’t provide utilties for converting raw CAN frames into usable physical signals. To support the raw to physical signal conversion, I extened the cpp-can-parser library to include the conversion methods found in xR3b0rn/dbcppp. While the dbcppp library did support all the features I needed (DBC parsing, and raw/physical signal conversion), it had dependencies on Boost libraries that made it cumbersome to use on the Raspberry Pi. My hybrid library only depends on stl can be found on my github; hankedan000/cpp-can-parser.
To Be Continued…
With cand, I can easily extend the DBC file to include new devices that I add to the CAN network. My next steps for the project will be making a data logging service that can record the CAN bus data as well as the GPS/IMU data.
References
- CAN Bus - Wikipedia
- Megasquirt CAN Overview
- Megasquirt CAN Broadcast Protocol
- Megasquirt CAN Control Protocol
Load Comments